As evident through the videos, I have used secondary tools (such as a hammer and random wooden blocks) to hammer in the wanted shape. Overall, the shape came out to be a 3D raindrop feature.
Monday, April 10, 2017
Blister Making 2
Swaying away from the given procedure, I copied the step by step process shown through a video that was placed into the blog. The images below show the finished product of the blister, and also videos have been edited and posted below. The video shows a clear indication of how the element was created.
BLISTER FABRICATION
The task was to create a Blister using the given materials. The tear shaped form was fabricated through the use of a hammering tool. When creating the piece, I have used the process shown in the video that was given to us by Russell. Here is what i did!
- As always, aluminium sheets were cut to wanted size.
- A wooden piece was given to us with the tear shape branded which had to be cut down using an electrical jigsaw and a bobbin sander
- Using this cut wooden board, the aluminium sheet was placed on top, which was clamped together to all four corners.
- Utilising the round shape of the nylon mallet, it was placed onto the side and was hammered down using another nylon mallet (this description is pretty shit so I will upload a video demonstration later.
- The thick mallet wasn't able to shape the sharper edge of the tear shape, so a thinner and sharper wooden piece was used instead.
- After creating the shape, the same sharp wooden piece was used the hammer the edges of the Blister to highlight the shape
Wednesday, April 5, 2017
Aluminium Tray
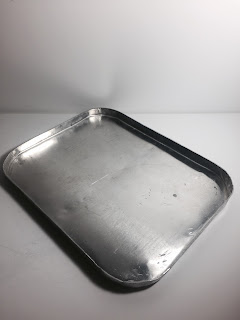
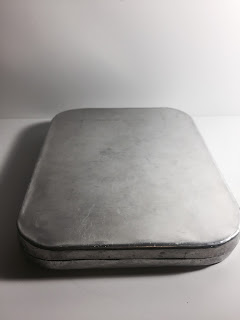
The task was to create the most identical trays with your partner which is evident in some of the pictures where the trays a placed on top of each other. Here are the steps that I followed in making this tray.
- With a partner, two identical pieces of aluminium sheets were cut.
- A wooden piece to help shape the tray was hand made (shown in the previous post)
- The metal sheets were annealed to assist in creating the shape easier.
- The wooden pieces were clamped on both sides tightly and the remaining edge (which should've been 15mm) were hit to one side to make the tray form.
- Frequent sharp puckerings on the corners were evident, so the corners were done with more precision
- Once all edges have been done, the top was sanded to make it more flat
HERE ARE SOME PICS!
 BEAUTIFUL!!!!
MAKING WOODEN SHAPE FOR ALUMINIUM TRAY
Our third task was to make an identical tray shape with a partner. In doing so we needed to hand make a wooden piece that acted as the actual shaper of the tray. We decided that our desired shape was of a rectangular with the edges rising up to 15mm, hence we needed to make a rectangular wooden piece with an internal offset of 15mm from the aluminium piece.
In making this, the bench saw and the electrical sander was used.
Here are some pics!!
Subscribe to:
Comments (Atom)


